Free Shipping – Store Wide
Epoxy Grout & Tools for Tile & Stone, Waterproof, Stain, Mold, Mildew, Crack & Chemical Resistant for Floor & Wall, Ready to Use, Easy to Apply & Clean (Beige, Sanded, with TK1N)
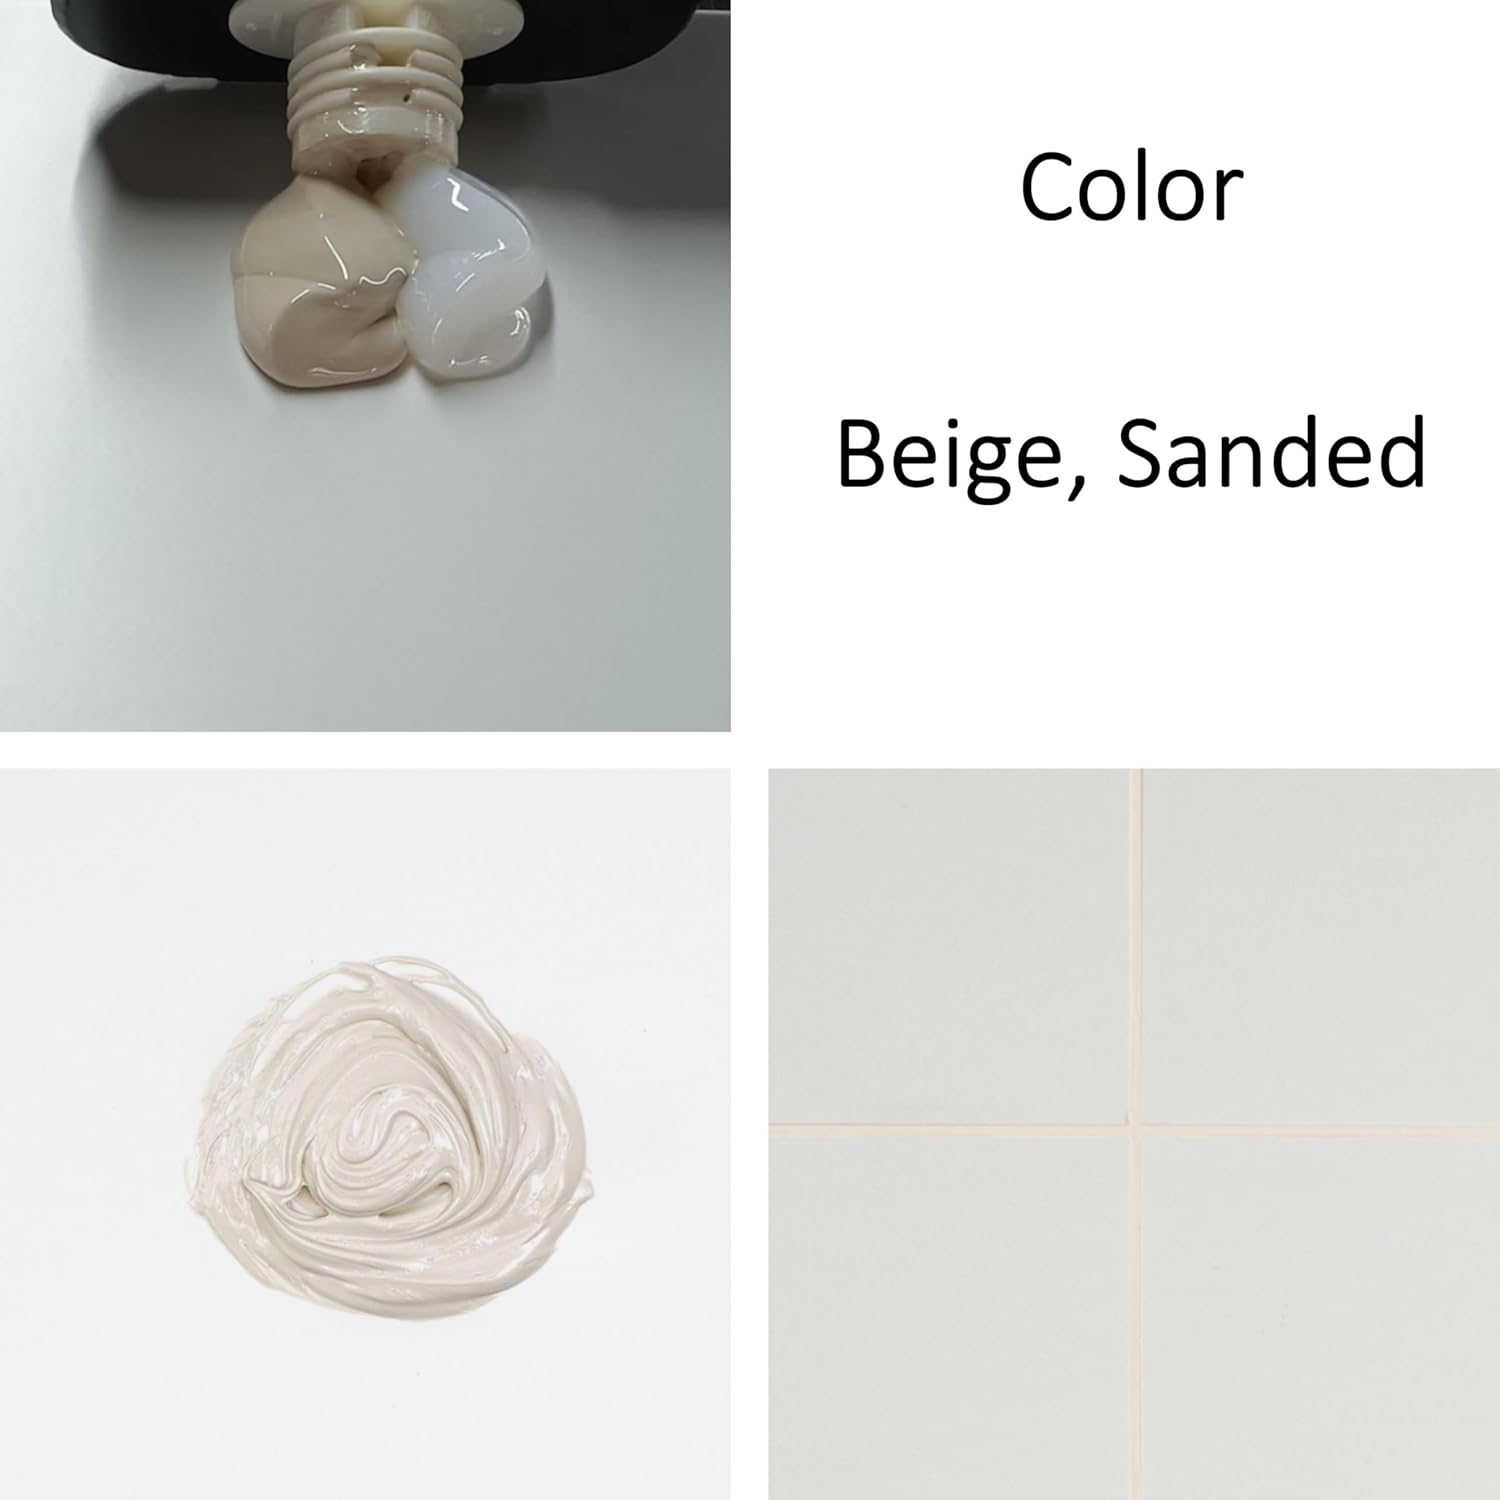
Epoxy Grout & Tools for Tile & Stone, Waterproof, Stain, Mold, Mildew, Crack & Chemical Resistant for Floor & Wall, Ready to Use, Easy to Apply & Clean (Beige, Sanded, with TK1N)
Brand: Demexgrout
A$81.70
-
A$83.80
Colour Name
Availability:
-
Select Styles for Availability
Shop with confidence
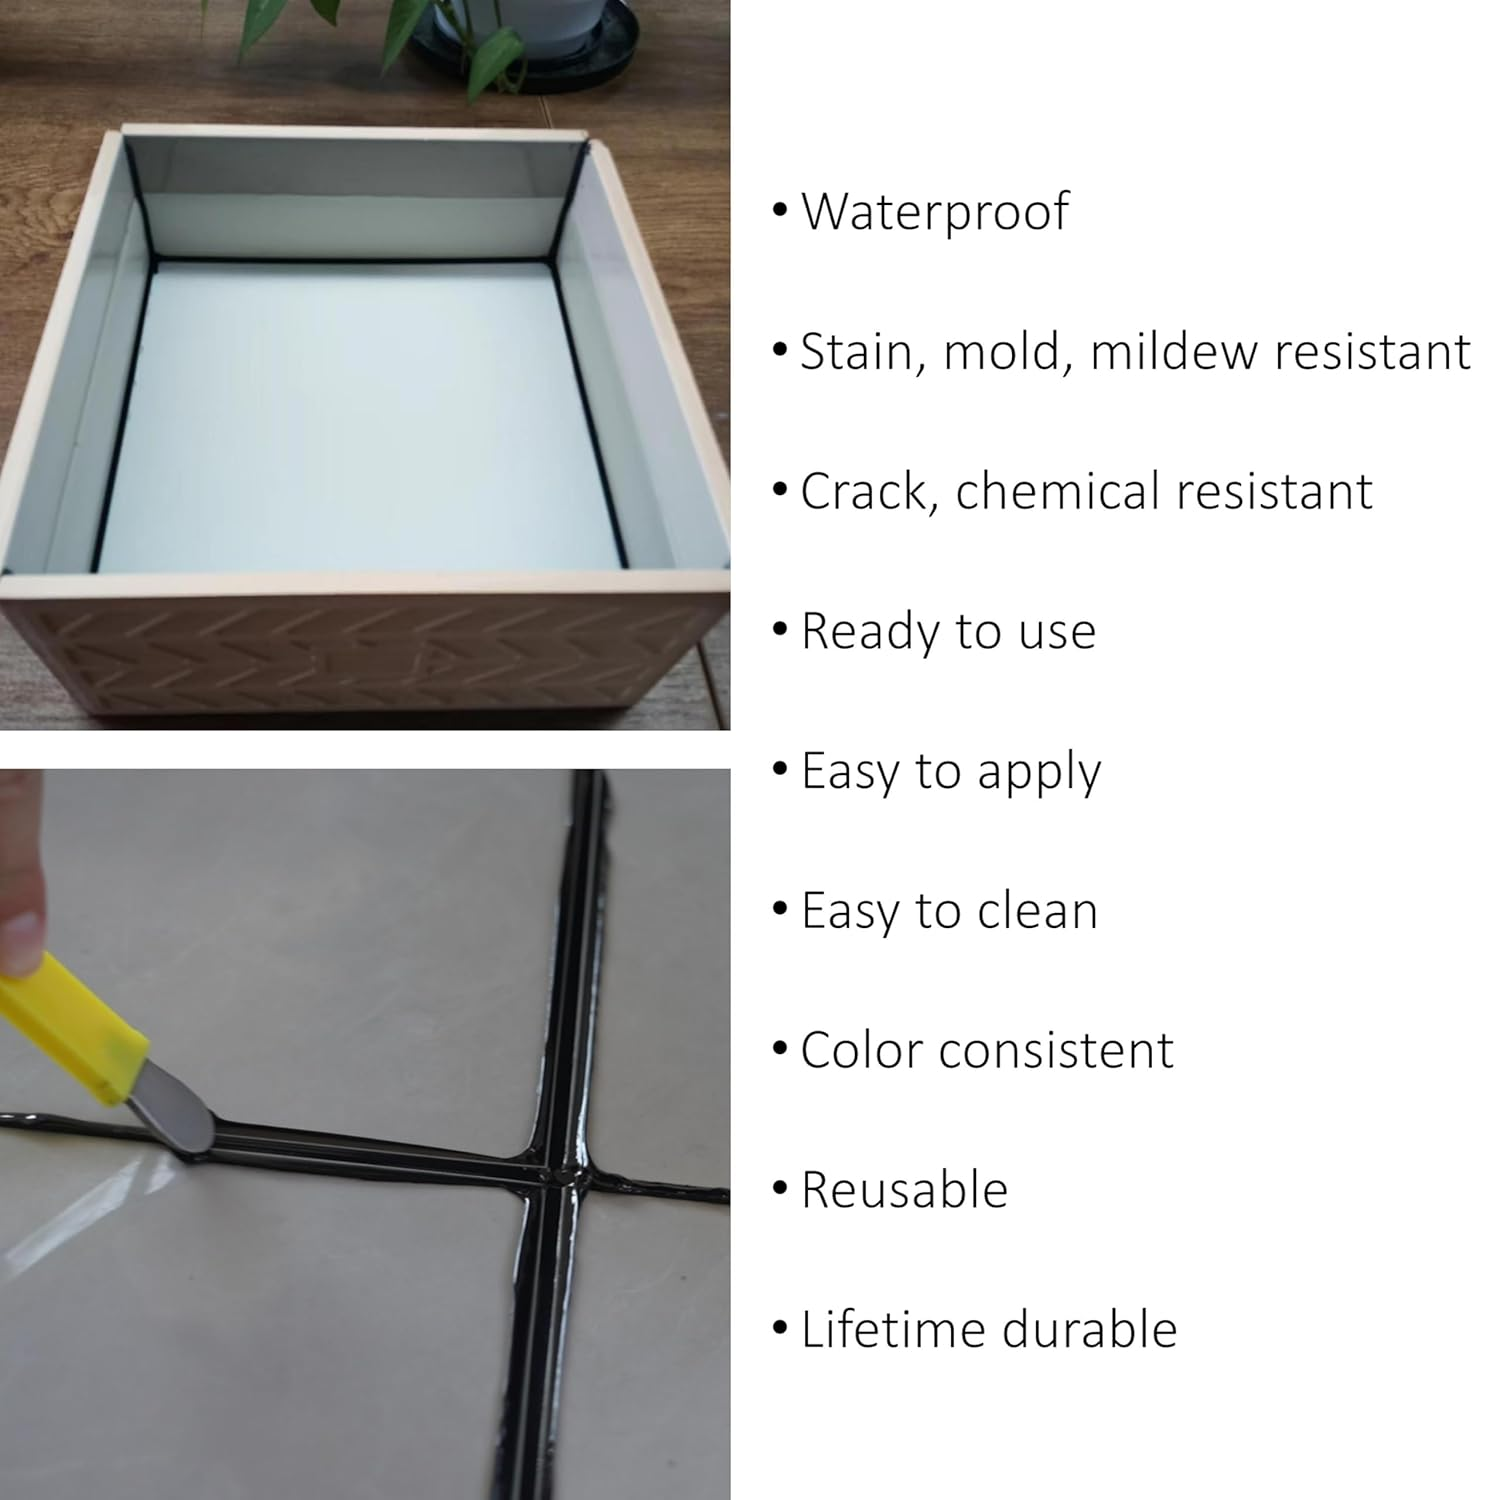
- Waterproof: its non-porous nature enhances hygiene in wet environments like bathrooms and kitchens. No extra sealing needed.
- Stain resistance: also because of its non-porous character, it resists stains from liquids like wine, coffee, and grease.
- Color consistency: it maintains the color consistency over time, unlike cement grout which can darken or change color with age and exposure to moisture.
- Easy to apply: ready to use, no mixing or stirring needed. Just dispense grout into the joints. Much friendly to epoxy allergy people due to no skin touch the material.
- Easy to clean: able to remove the residue after it cures in 4 hrs at 25°C. No more hassle cleaning procedure.
- Chemical resistance: it is resistant to a variety of chemicals, including harsh cleaning agents, making it ideal for commercial kitchens, laboratories, and industrial settings.
- Longevity: when properly installed, it can last for decades without needing replacement, providing long-term cost savings and peace of mind.
- Flexible: it has some flexibility, allowing for slight movement in the tiled surface without cracking or breaking, which is particularly beneficial in areas prone to structural movement.
- Wide temperature range: it can withstand a wide range of temperatures, making it suitable for both interior and exterior applications, including areas exposed to freezing temperatures.
- Attention: DO NOT use water or sponge to wash the grout excess! This product is not water cleanable. It needs right dual barrel caulking gun and related gadgets to apply.
Product Description
About Epoxy and This Product
- Epoxy grout is a type of grout commonly used in tile and stone installation, which is made from epoxy resins and hardeners. This composition gives epoxy grout several distinct properties, such as waterproof, stain, crack and chemical resistance, no efflorescence, much better bonding, compressive and tensile strength, etc.
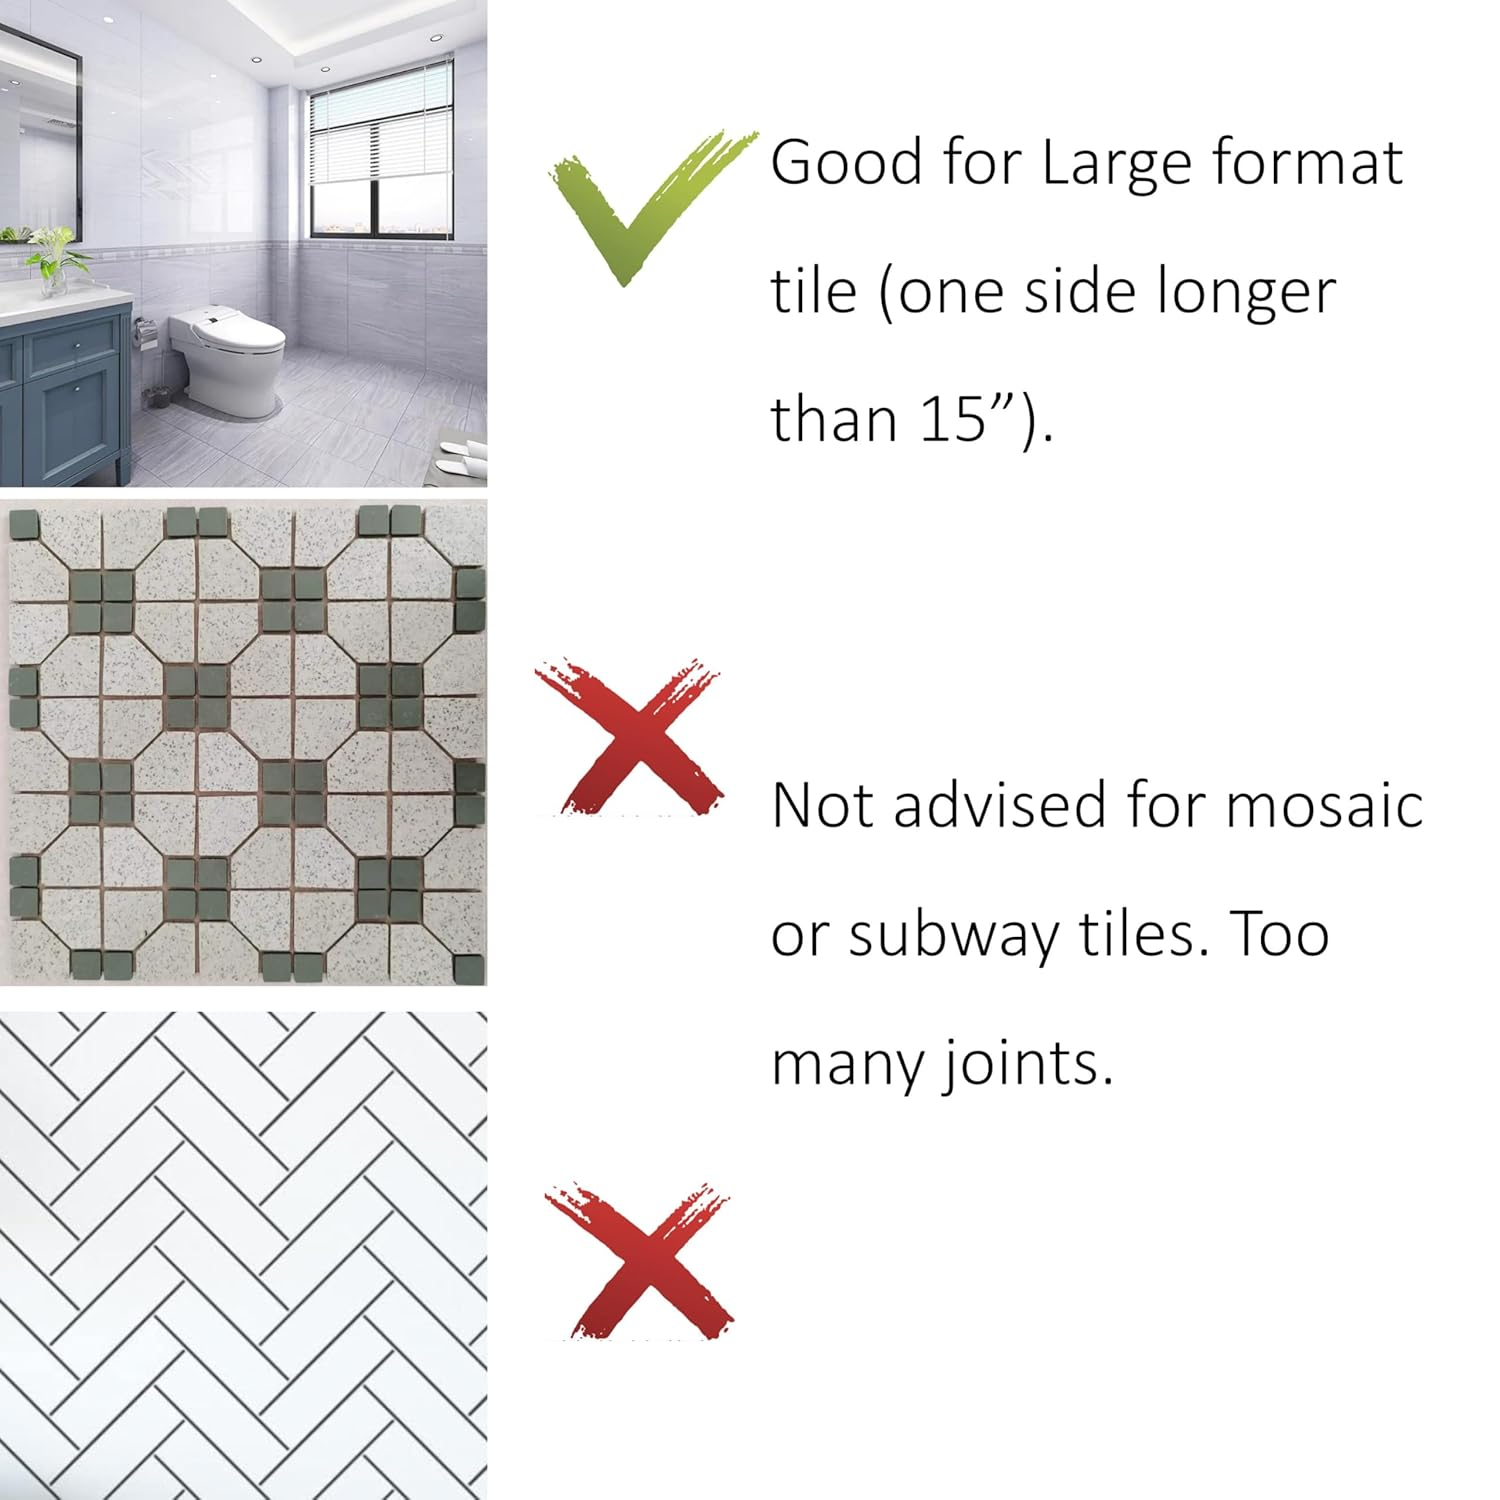
- Its growing usage is also due to the facts of more large format tiles being installed and narrower joint width becoming more popular. Less volume of grout per site balances the concern of its high material cost (almost 4 times to the cement grout).
- The main benefit of this product is to complete the grouting with epoxy much more easily, no mixing or stirring needed, no worry of too much or too little liquid added causing color inconsistency, no more that sort of physical labor to float the grout into the joints, no more 2-3 times of water and sponge washing, no haze cleaning, no extra sealing needed, much less maintenance required after the installation.
- Due to this product's special design and different installation way, please thoroughly read the following instructions before you make the purchase. Test in a small area first to check the color and try the installation steps, before applying on the whole project.
1. Ready the site
1.1 Clean the site
- Make the site clean, dry, even, free of debris.
- Dry site matters. Wet or damp site would affect product's performance. It is a difference from water cleanable grout.
- Better to vacuum the joints. Too much dust left inside would affect the bonding.
1.2 Apply the wax
- For any abrasive or unsmooth tile, spread the cleaning paste (works as anti-bonding wax) lightly OVER the tile joint edge. Do not spread inside the joints.
- It facilitates the clean up of the cured grout excess a lot.
or Use the masking tape
- Able to peel off just after shaping the grout. Need not wait for the curing to remove the epoxy excess.
- Peel slowly to avoid to take out the grout from the joints.
or No wax and tape
- Only advised on glazed and even edge tile or stone.
2. Ready the cartridge
2.1 The seal and nozzle
- For 1.5mm to 3mm wide joint, the default 2mm nozzle outlet is good to go. Just make sure no burr at the outlet.
- Cut or flatten the outlet if needed.
- Keep the cap if to reseal for a next time usage. Store erectly.
2.2 Load the cartridge
- Twist tight the nozzle to the cartridge.
- Lock the cartridge neck in position to fix well.
2.3 Discard the 1st pump
- Get rid of the initial 10cm material, of which the two components are regarded not mixed evenly, and thus not advised to grout the joint.
- If the grout is still tacky when it should be cured, it is most probably due to the cause of not 1:1 mixed.
2.4 Pressure release
- To stop the material flowing out, or to pull back / forward the rods, press the pressure release button.
3. Install the grout
3.1 Dispense the grout
- Dispense slowly to make the joints fully packed and the material count.
- If material touches skin, use wet or alcohol wipe to clean.
3.2 Shape the joints
- Use the gadgets to shape the grout after finishing each cartridge, which normally takes about 10 minutes.
- The trick for shaping is to divide the excess from the grout inside the joints. It eases the residue removal after it cures.
3.3 Clean the shaper
- Use tissue or rag to clean the shaper after each press.
- If any voids spotted, use the material on the rag to refill.
- After shaping, leave the site as is for itself to cure. DO NOT use water or sponge to wash. It would cause mess.
3.4 Scrape the excess
- Scrape the cured excess and the job is done.
- It's able to scrape in 4 hrs at 25°C. Finger touch the excess to feel the set. Advise to scrape the next day.
- Colder weather, longer time to set. Hotter, sooner.
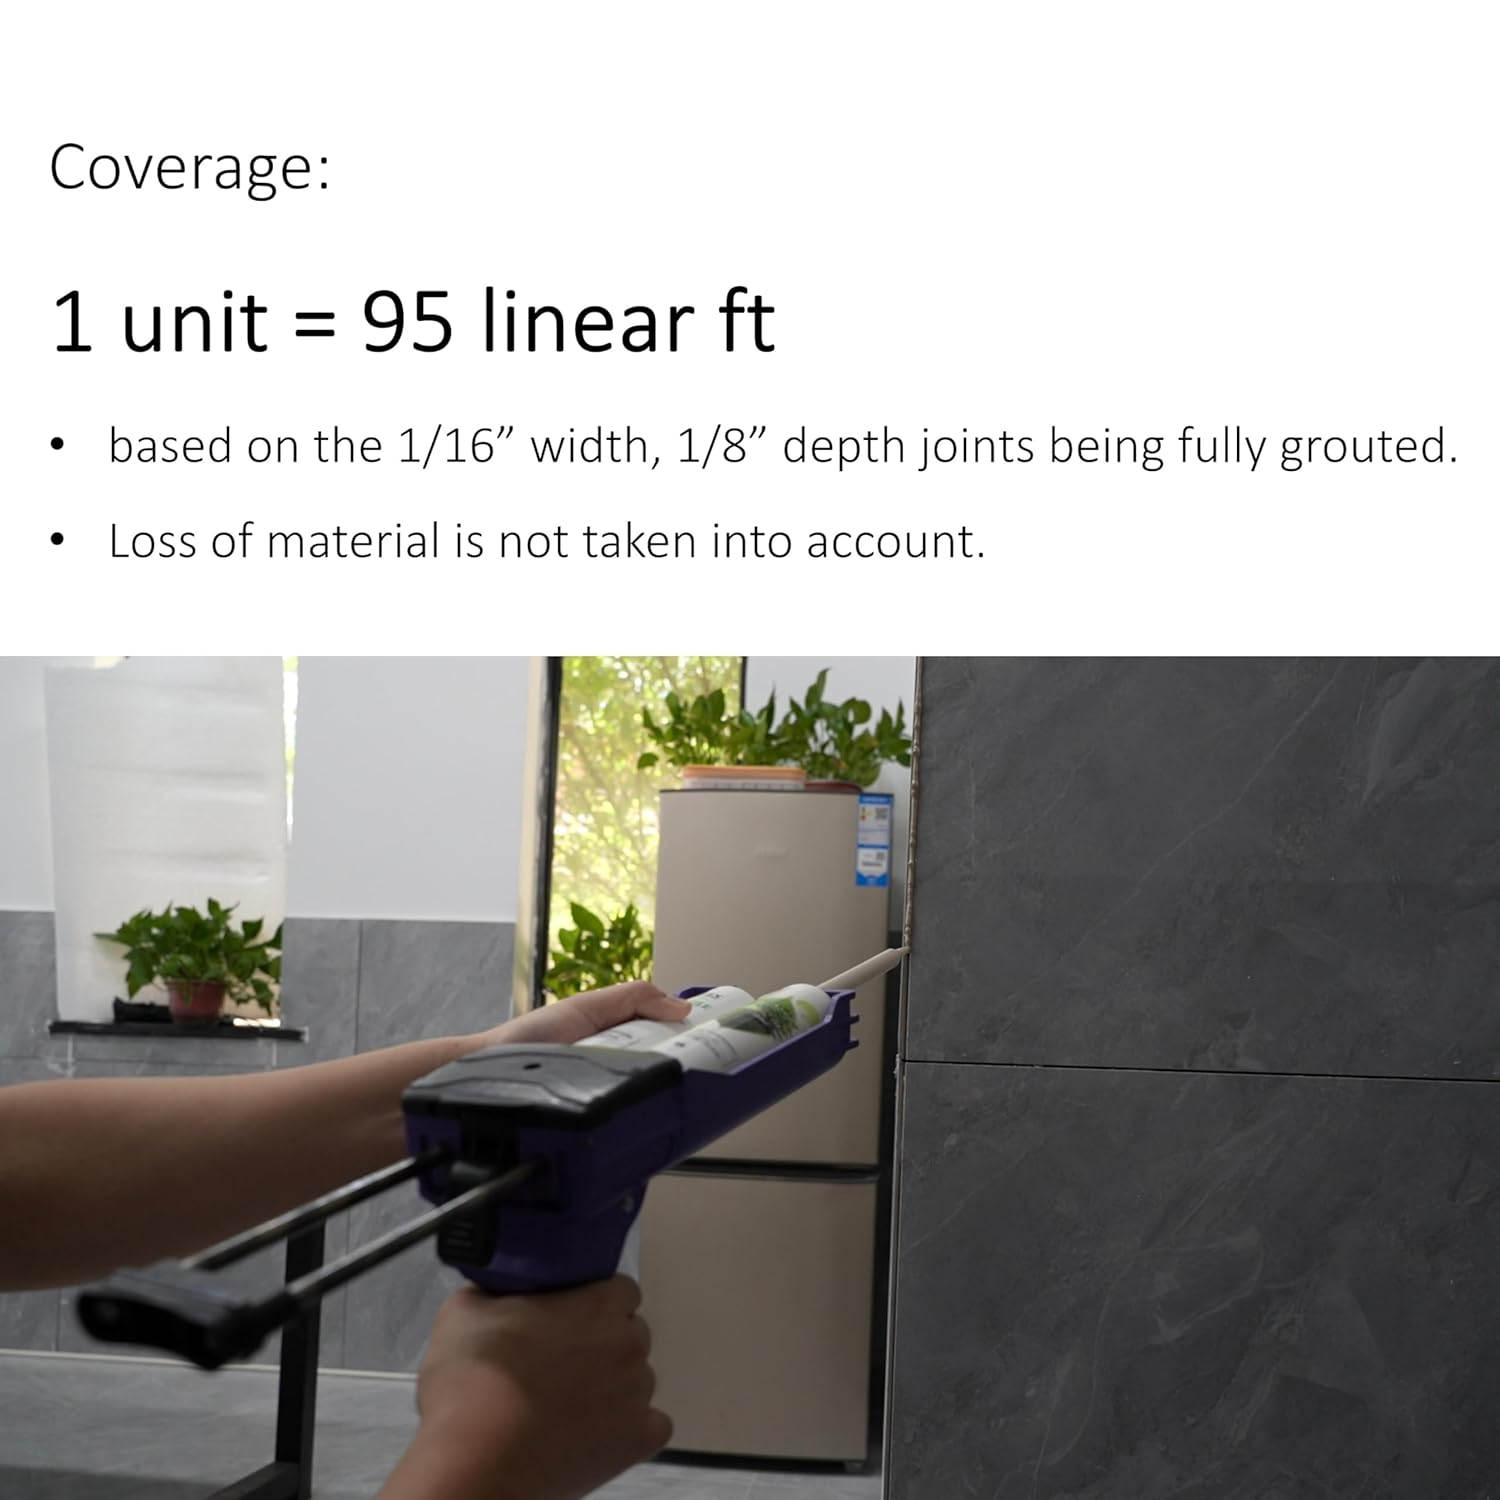
How Many Units for the Project?
Coverage
- Data is without considering the material loss.
Brick Bond, 50% Offset
- Say the tile is 30×60cm, then the joint length to be grouted for this floor or wall is 25.2m.
- Suppose the joint size is 1.5mm wide × 3mm deep, then 1 unit is enough.
Transverse line: 0.6×4×7=16.8m
Vertical line: 0.3×4×7=8.4m
Square Grid
- Say the tile is 30×30cm, then the joint length to be grouted for this plane is 12m.
- Suppose the joint size is 3mm wide × 3mm deep, then 1 unit is also enough.
Transverse line: 0.3×5×4=6m
Vertical line: 0.3×5×4=6m
Before You Buy
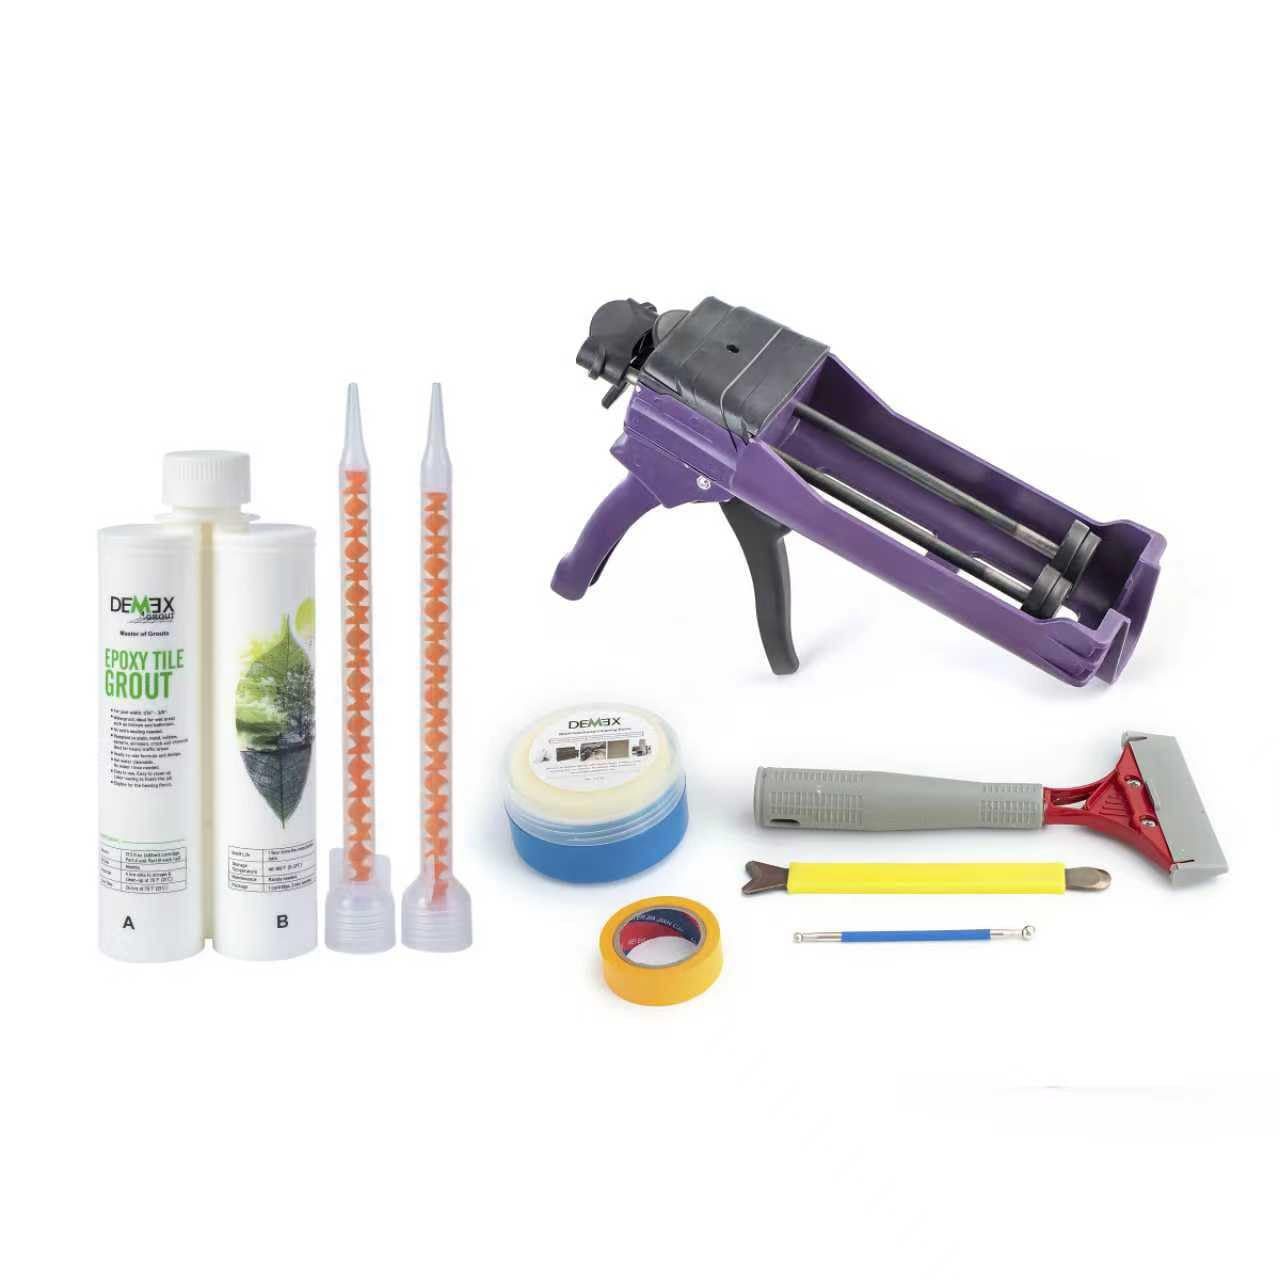
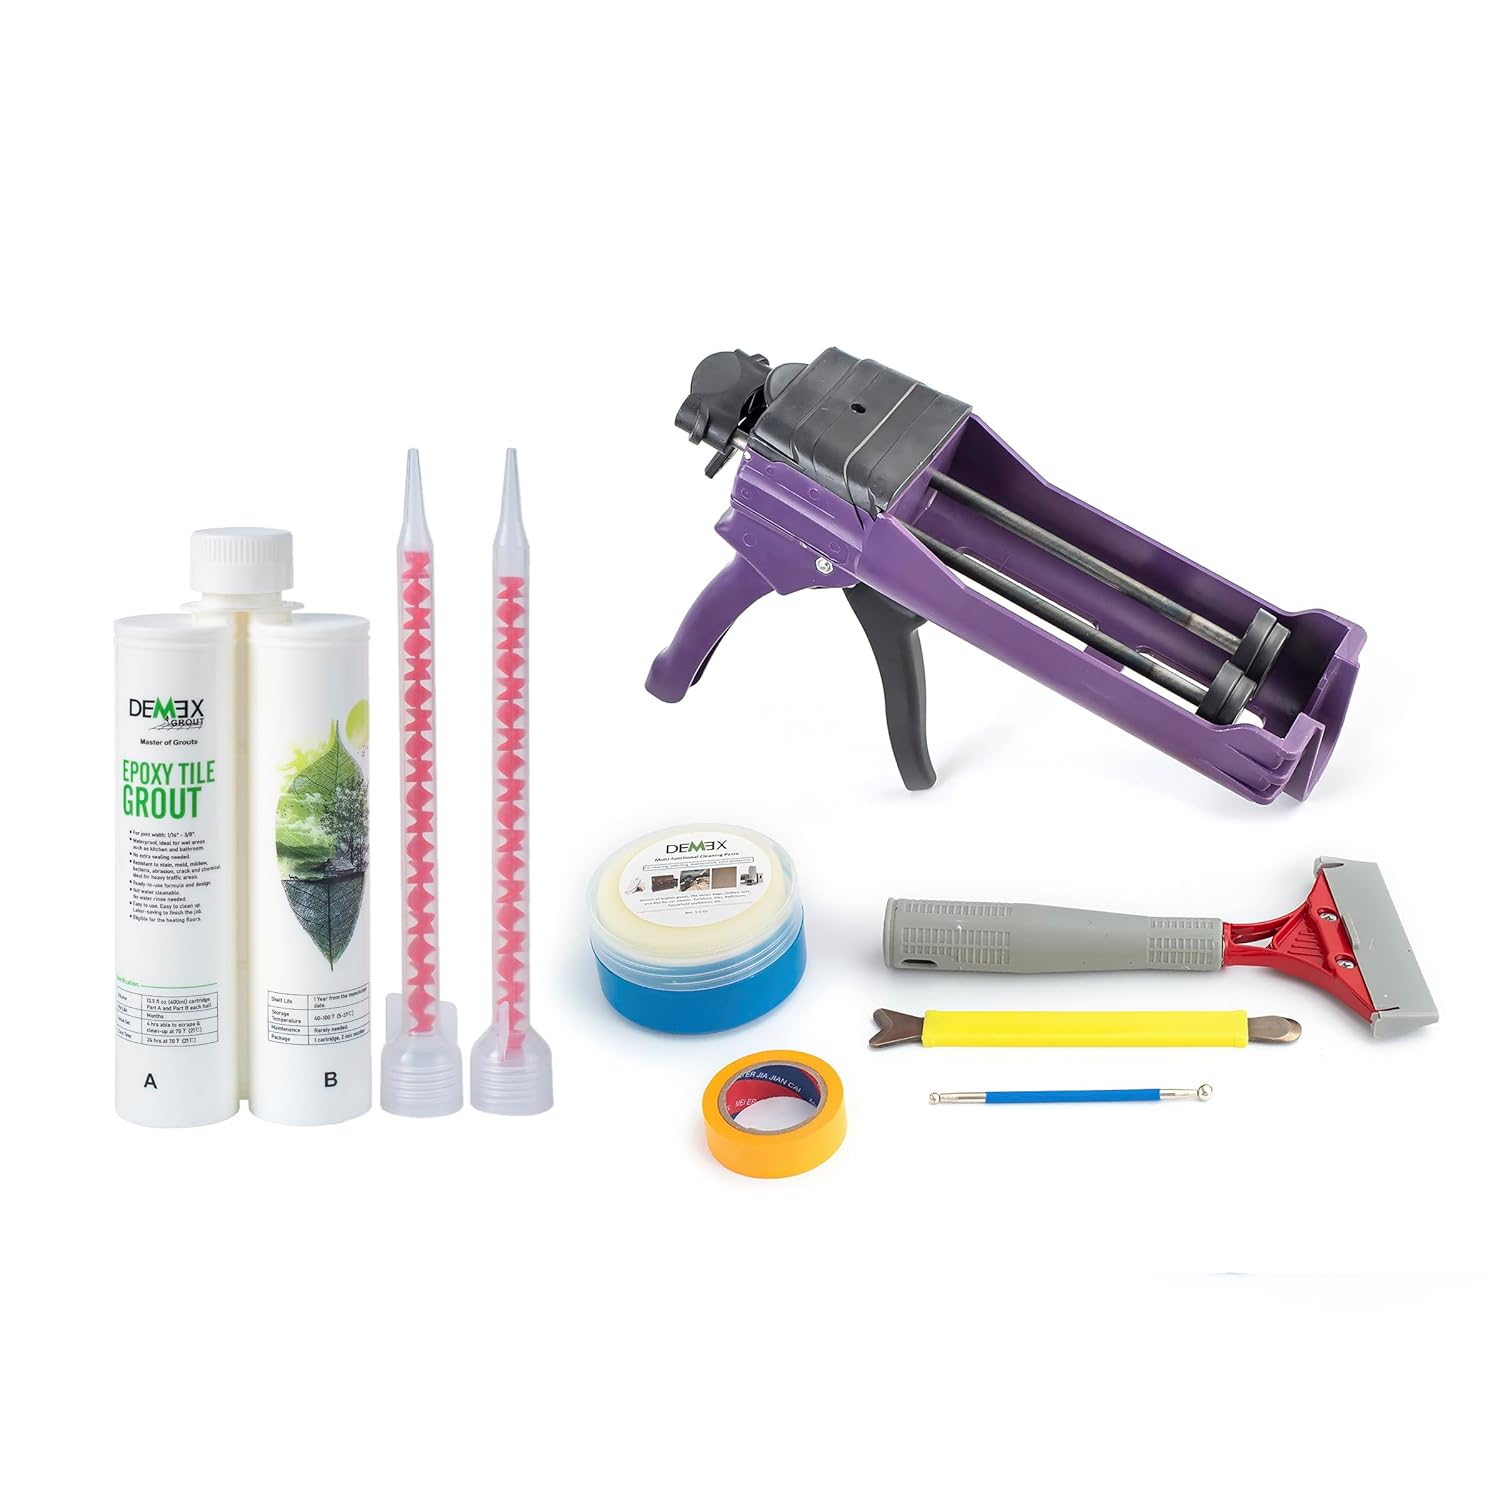
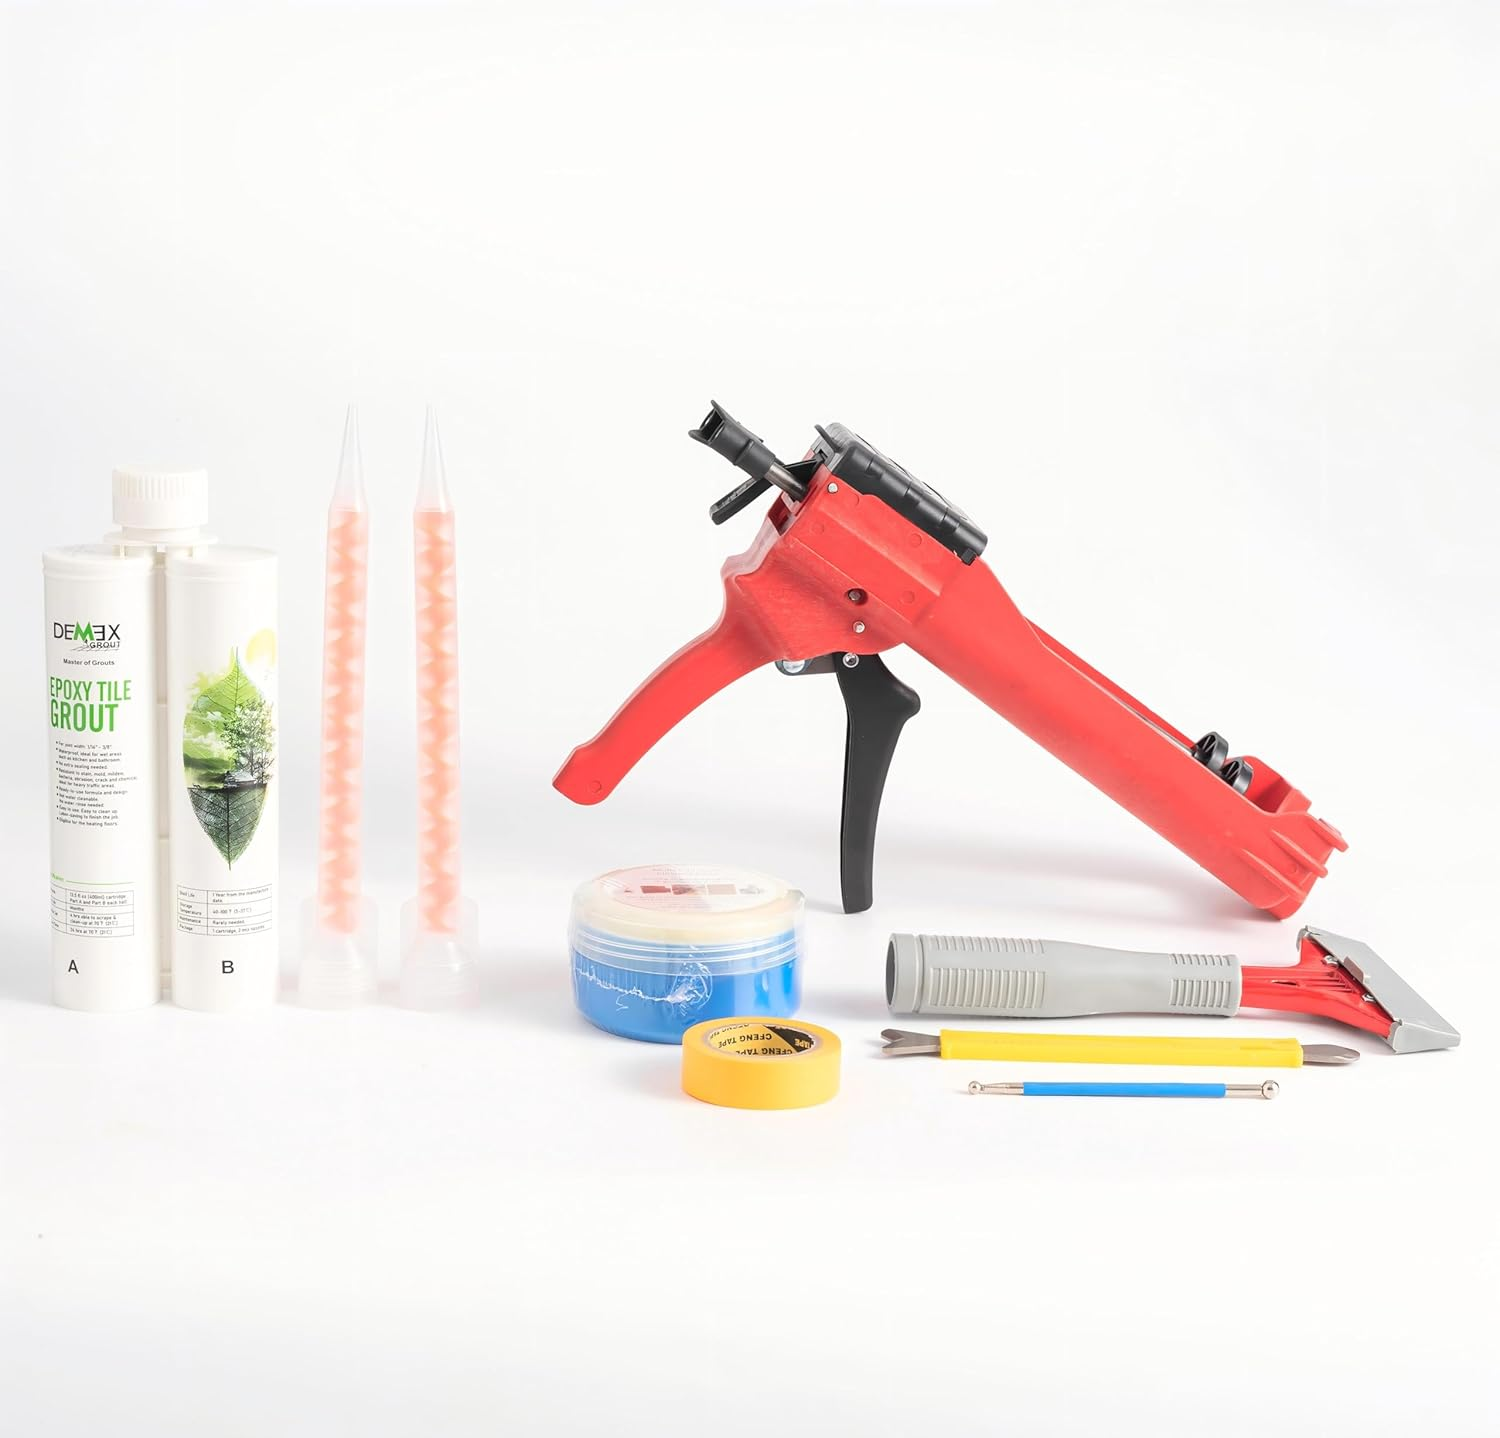
- Tool kit is included.
- Sanded grout flows much slowly than the unsanded, and it takes more power to be dispensed. Be patient with it.
- This product is not advised for grouting small size tiles such as mosaic or subway. Too many lines.
- It is not water-cleanable. DO NOT use water or sponge to wash the excess.
- It takes time (4 hrs at 25°C) to initially set to start scraping the epoxy excess. It should be a drawback for a contractor if he originally does not have to return to the jobsite.
- Due to the epoxy's intrinsic character, color white may yellow a bit after long time exposure to UV. This might be a concern for the exterior application.
Application in Cold Weather
- In cold weather (below 40°F), the epoxy may become viscous and difficult to dispense out.
- Heat the cartridge with head down in hot water (140°F) for 20 minutes. This helps the grout flow, especially for the sanded one.
- Heated material is faster to cure.
- Item Weight: 2.03 kg
- Item Model Number: BND
- Country of origin: China
- Package Dimensions: 37.1 x 23.8 x 14.5 cm; 2.03 kg
- Manufacturer: Gelangte
A$81.70
-
A$83.80
Shipping to Australia
Delivery time varies by location
Return & Refund Policy
Check our return & refund policy
Security & Privacy
Safe payments: We do not share your personal details
Availability:
-
Select Styles for Availability
Sign in
or create an eMega account
Shop smarter — get exclusive deals & order tracking